

Welcome back to Part 2!
This second part might better be called “Xcode IDE usage for Beginners” though. If you have not look at the part 1, please go through it first then come back again for better understanding.
Let’s go further shall we!
Navigator Area
In Navigator area, there are lot’s of different navigators, that you can switch between while in the Navigator Area. As there are many navigator in that (total Nine), but in this blog I’m going to demonstrate about the three common ones you will use as a beginner.
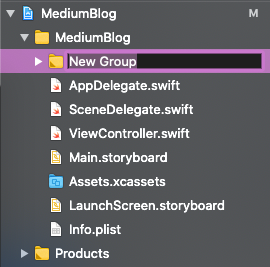
Xcode Project Navigator
The Project Navigator is where you will see all the files which are associated with you project.

Manage you files
While in the Project Navigator, you can also create new Folders/Groups to organise your files. To create new Group, you just have to right click on project folder and can check for “New Group”.

Adding and Creating new Files
To add any new files or to create them, you have to right click on Project Navigator and create new file(s) or add any existing file(s) to your project. Another way is to drag and drop files/folders from you computer to directly into Navigator Area and will popup a dialog for how do you want to add your files.

Xcode Search Navigator
The Search Navigator tab will be used to easily look for the pieces of text into your project.

The result will give you a lot of files which contains your search keyword, and trust me your are going to use quite frequently into project for searching any function, method or variable.
If you want to use shortcut for search you can easily do by pressing cmd+shift+F from keyboard. No matter where you are in Xcode, in any Editor area or somewhere else, it will switch to Search Navigator to execute a project wide search.
Issue Navigator
In Xcode, Issue Navigator will show you all error/warnings within you project.

After writing any function or class into you project, and if you are going to build and compile to test, if there are any problems where Xcode can’t build your application, it will stop and show you red coloured errors. You can click on any error, and it will show you in which File and at which line that particular error exist in Editor area.
For warnings, it will show you in yellow colour in the Issue Navigator. Sometimes warning are not that critical to resolve for building and running your application (They are warning that may be potential issues).
Even if you writing code in Editor Area, if any error or problems will be there through which code is not executable, at that time also it will show us error or warnings itself in Issue navigator.
Editor Area
In this Area, you will be spending your most of the time in Xcode! Because this is where all coding, configuration and user interface building will be done.
The appearance will change depending on which file you have selected. If you have selected Swift file, then it will show code editor like below. Even so, if you have selected user interface file (like a Storyboard or XiB), then it will show you an Interface Builder which is basically visual editor for you user interface.
Coding
If you have selected any Swift file, then Editor Area will be visible.

Breadcrumb and Navigation — These are little forward and back arrows in the upper left corner of the editor area.

They perform as Back and Forward buttons on your browser and let you navigate through files (which you have previously visited) and it can be very useful.
Jump Bar — The second way to navigate or jump in files quickly is by using Jump Bar, it can be done by clicking on any piece of breadcrumb and it will show you a menu of groups or files that you can select.

Methods in Breadcrumb — At the end of Breadcrumb if you select last piece, it will open a menu which display all the methods currently existing in the selected file and you can navigate to specific method from here as well.

Searching and Replacing — We can search and replace anything in the file by pressing cmd+F, it will open a search bar within Editor Area and it can also be useful to directly go to specific area in your file. You can also use this Search bar to replacements anything within your file.
Jump to Definitions — In Editor’s area, if you want to check the origin or definition of any class, you can hold down Cmd and click on Classname to quickly jump to that file.

Breakpoint Area— A Breakpoint is Xcode debugging feature, that let you pause the execution of Code at a particular line. To set the Breakpoint(where the line numbers are displaying), you can click to set at certain lines of code. If you click again at the same breakpoint it will dim out (that means the Breakpoint is disabled or turned-off). To remove breakpoint completely, you can drag Breakpoint to Editor area.

Configuring Xcode project properties — The main part of Xcode project is your Xcode project file.

In this screen, you can configure many things like:
- Define you application name
- Bundle Identifier (it should be unique)
- Application Version
- Allow application to work on different platform and Device orientation
- Set minimum iOS App version number
- Add additional Apple Libraries and Frameworks
- Code Signing options which is mandatory for publishing your application App Store.
- App Icons and Entry screen.
and many more!
